Microgreens. Save money & grow your own! Here’s how.
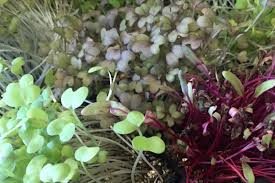
Do not worry if you were born far from having a green thumb or plants seem to die within 2 hours of spending time with you. Microgreens are SUPER EASY to grow and harvest.
Microgreens simply put are the shoots of salad vegetables such as arugula, Swiss chard, mustard, beetroot, etc., picked just after the first leaves have developed.
Have you seen them at your local grocery store or whole foods market?
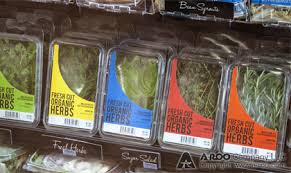
Expensive for what appears to be the stuff you spend all spring and summer removing of your flower beds? But, I just love when I eat at a good restaurant that decorates dishes with this vibrant goodness. As many of you know, we are on a tight budget at the moment so Whole Foods and packaged microgreens are without question – not on the menu. So I set out to grow my own and you know what I found out? Its way cheaper, super easy, and you can harvest and re-seed all season long. In fact, I went to a consignment shop and bought that little shelf for $8 so I can continue growing them in the colder months.
benefits of microgreens | why bother, you ask?
According to Dr. Axe, microgreens have the following health benefits:
- nutrient-dense
- contain Polyphenols which are antioxidants that fight free radicals in your bod
- heart issue preventative measure
- reduces chronic disease risk
- grown year round (indoors)
For more information, click here. Or just take my word for it. They are a phenomenal little super food chock full of benies!
growing your microgreens
Get this! You do not even need to plant them. Whaaaaaaat? The seeds lay on top of the soil. I have a ton of varieties and they all call for the same thing. Lay them on top of the soil. When you order your microgreens, they should come with some directions but if not, you can google the type of seed and find a ton of directions from growers and distributors. I provide links to the products I buy and recommend below.
____________________
Disclaimer: Sanity or Lack Thereof is a participant in the Amazon Services LLC Associates Program, an affiliate advertising program designed to provide a means for sites to earn advertising fees by advertising and linking to amazon.com.
However, I promise to never ever provide a link to a product that I do not love and use!
______________________
You will want to find shallow pots for the seeds. You do not need to go all fancy here. Just shallow rectangular or square beds of top-notch soil. I used Miracle Grow potting soil but I am sure you can use whatever kind your prefer as long as it has good nutrients.
follow these steps
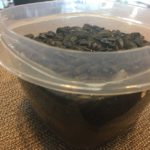
Step 1: Certain varieties have to be soaked up to 12 – 24 hours before planting. I soaked my sunflower sprout seeds for about 15 hours.

Step 2: Fill your trays or pots with good soil. The most important thing here is ensuring that there is adequate drainage. Hell, one of my planters came with a clear plastic top and I used that as a planter too (see image right). If your containers do not have drainage holes, use a small drill bit or poke holes with a scissors. Not too big. Just enough so the soil can drain and not become a mud puddle.
Step 3: Take a handful of seeds taking care not to overcrowd them but they seem to do well even in a crowded environment (but they will tangle more easily).
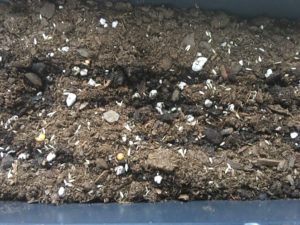
Step 4: Water the soil and seeds lightly. Place containers in partial sun/shade area of your home. My microgreens do very nicely on my screened in deck. They get the sun in the morning and shade in the afternoon.
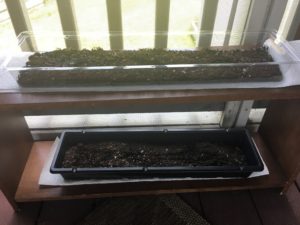
Step 5: Once the sprouts are fully grown (up to 2 weeks, about 3-5 inches tall), cut them at the base. If the seed remains, it s
hould easily rub away with your finger tips. Wash them gently, and store in a plastic Ziploc bag with a dry paper towel inside. The paper towels will soak up moisture from the plant which will help it to last a bit longer in the fridge. Now its ready to use. Eat up!
I picked up some containers from my local nursery. But, I think the kit above on Amazon is absolutely adorable and would be a great all-in-one solution for the beginner. No pressure. Just trying to make it easy as pie.
Note: I will update this post as my little plants start to blossom, grow, and ready to cut. I may even add a recipe or two along the journey. Don’t forget to check back. Lets grow them together.
my favorite!
My favorite variety are sunflower sprouts. I bought this one in bulk since I knew from the last time that these were by far my favorite microgreens to add to my dishes! You can see that I topped my Habanero Mango Chicken Tacos with microgreens. It is just the right touch and adds texture and freshness.

Don’t stop with tacos, please! Once you harvest a bunch, they will not last long in the fridge. I have been known to put them on just about everything. I make this nommy Naan veggie pizza for the boys on the weekends and top it off with microgreens when I have them ready to go. Delish!
I love adding them to the top of anything Asian, especially stir-fry over rice or quinoa.
Stuff your burritos, wraps, or pita pockets with the usual. Then add a handful or microgreens to top it off the right way.
Microgreens add texture and taste outstanding. In lieu of carb-packed crunchies on your meal, place a handful of these little gems to finish it off and give you that crunch. You won’t miss those pesky (to the hips) chow mein noddles.
visual impact | plating
I’m not going to lie. I think the best thing about microgreens is the visual impact they have when plating. They simply look good. They also add height and interest to the plate with very little if not any effort. Not too mention, they make you look like a rock star in the kitchen!
let me know!
What is your experience with microgreens? What is your favorite way to enjoy microgreens? Are you starting this journey with me by growing your own? Well you have to let me know so we can share our success. Leave me a comment below and I will be sure to get back to you asap.
until we eat (or grow something) again…
